Change how the schedule looks
Switch between week, day and month, arrange the rows by employee, time of day, position or location, and filter the schedule to what you need.
You can look at the schedule a week, a day or a month at a time, group its rows in different ways, and filter it. These choices change only what you see. They don't change any shift, and nobody else's view changes.
Week, day or month
Above the grid, select Week, Day or Month.
- Week shows the whole week, Monday to Sunday unless your organization has changed the first day of the week.
- Day shows one date, with all the same tools. The totals under the grid are still for the whole week.
- Month is for reading and planning ahead. You can't change anything there: select a date to open that day, or select Week at the start of a row to open that week.
Use the arrows beside the date to move back and forward, and Today to come back to today. In Month, that button is This month.
Arrange the rows
Select By employee, By time of day, By position or By location.
- By employee gives each person a row. It's the only arrangement where you can drag shifts and add them with +.
- By time of day groups shifts by the day part their start time falls in. It appears once your organization has day parts.
- By location appears when the schedule shows more than one location.
In By employee, you can change the order of people with ↑ and ↓ beside each name, or drag a name onto another row. Reset row order puts everyone back in alphabetical order. The order you choose is yours alone.
Filter the schedule
- Select Filters (the funnel button beside the view buttons).
- Tick what you want to see. You can filter by location, time of day, position, conflicts (Conflicts only), staffing (Open only, Unassigned only) and employee. The schedule updates as you tick.
- Select Done.
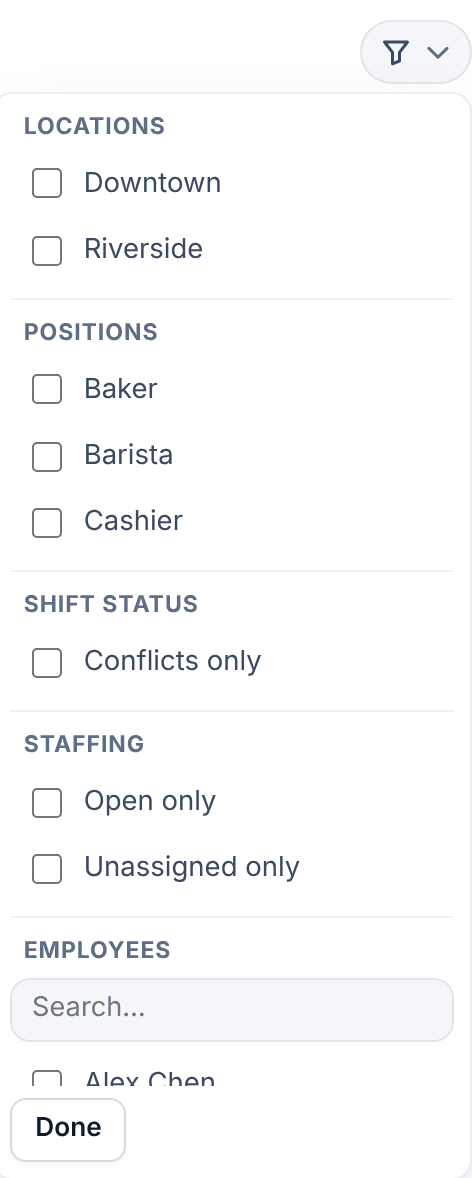
A number on Filters shows how many filters are on, and Clear all removes them. Shift Amp remembers your location and position choices on this browser.
Set up day parts
Day parts are named times of day, such as Morning, Lunch and Close. Owners and operations administrators set them for the organization. Location managers can give their own location a set of its own, which replaces the organization's there.
- Open the account menu at the bottom of the left menu (your name), select Settings, then select Scheduling.
- Select Manage day parts.
- Under Organization defaults, or under a location, select Add a day part.
- Enter a Name, and choose From and Until.
- Select Save day parts.
Day parts can leave gaps, but they can't overlap. Shifts that start outside every day part are grouped under "Other". Changing day parts changes no shifts and notifies nobody.
To choose what each shift card shows, such as its position or length, open the account menu (your name), select Settings, then My preferences, and use Shift cards. See Change how Shift Amp looks for you.
Was this article helpful?
More in Building the week
- Add a shift
- Move, copy, or delete shifts
- Understand conflict flags
- Copy last week
- Save and reuse a week template
- Reuse common shifts with templates
- Set up a repeating shift
- Fill shifts with Auto-assign
- Edit several shifts at once
- Add a day note or close a day
- Add a checklist to a shift
- Set a weekly hours limit
- Change the first day of the week
- All of Scheduling